How to plant and grow potatoes in the garden
When the planting season comes, there is no time to think about how to plant potatoes. Gardeners operate according to the traditional scheme: they make holes on the site, throw tubers, take care of plantings and harvest. However, planting in the beds has its own characteristics and rules - observing them, you can significantly increase the return on the site.
Is it possible to collect a bucket from a bush if you plant potatoes in the beds? What are the ridges and how do they help increase the yield? How to grow potatoes in tall beds? All the subtleties of planting, the secrets of preparing tubers, tips and tricks - in our article.
The content of the article
Pros and cons of planting potatoes in the garden
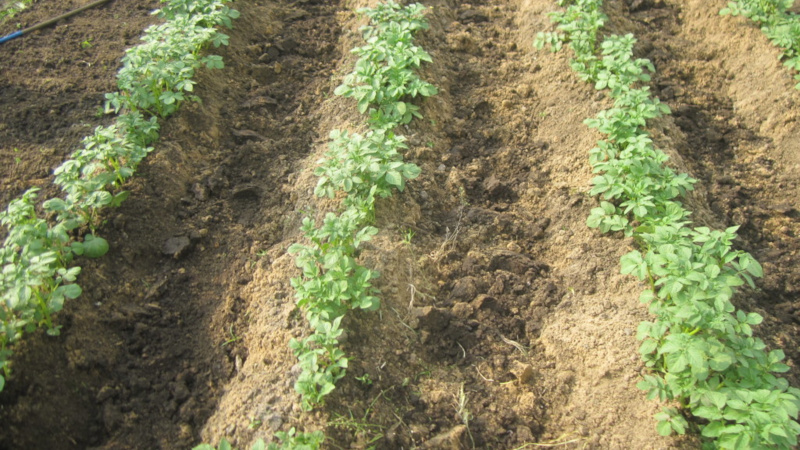
The habitual cultivation method for Russia is potatoes in the garden. So the moisture in the soil is better preserved, it is convenient to apply fertilizers and care for the seedlings.
How to properly plant potatoes in ridges:
- The distance between the beds for early varieties is 50 cm, between holes in a row - 25-35 cm.For mid-season and late varieties: between rows - 60-70 cm, between tubers - 35-40 cm.
- The beds should be level so that they can be easily worked. It is convenient to plant on a lace: tie a twine to two pegs, equal in length to a bed. Stick the pegs in at the beginning and at the end of the ridge, measuring the row spacing.
- If the soil is dry, plant the potatoes on a plain at a depth of 5-6 cm. In the case of close groundwater and in lowlands, plant it in ridged beds. In dry areas - in trenches or holes.
If you take into account all the features of your planting area and form a potato bed according to the above tips, you can harvest 20-50% more. There are no downsides to landings in the ridges. There are features in which the usual planting in the beds changes to an alternative one.
Types of beds
Is there little space on the site? Want to grow potatoes on your balcony? It is possible. We will show you how some ways to create beds in a small area help to feed the whole family with delicious potatoes.
Narrow beds or Meatlider method
The main condition when planting in such beds is to comply with all conditions, no matter how unusual they seem: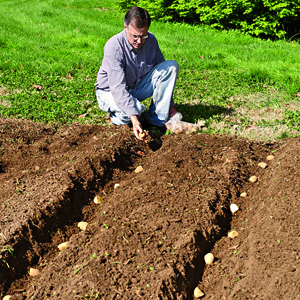
- Form a horizontal flat ridge 45 cm wide, limit it on the sides and ends with earthen sides 8-10 cm in height. The length of the ridge is arbitrary. The width between the ridges is 105 cm. The ridges and paths must not be interchanged, the passages must not be dug up. Make beds only on the day of planting.
- Plant the potatoes near the sides in two rows, the distance in the row between the tubers is 4-7 cm.
- Water only in the root zone at any time of the day.
- It is impossible to loosen the soil so as not to break the forming tubers.
Important! For the first experience of planting potatoes in this way, form 2 beds of 3 m each. In the fall, compare the harvest from the usual beds and with the narrow one, according to Meatlider: where did you manage to collect more tubers from the bush?
Warm beds
Due to the loose composition, they are more suitable for rainy areas. Artificial watering of these beds is impractical because it erodes the soil and exposes the roots.
A warm bed for potatoes is done as follows: they dig ditches 1.2 m wide, two bayonets deep. First thick branches are laid at the bottom, then thin branches, sunflower stalks, fallen leaves and compost. All layers are lightly covered with earth. The top layer is 5 cm high ground.Potatoes are spread on it and simply covered with earth on top. Small mounds turn out. So that they do not crumble, fix them with small logs, scraps of boards, etc. After planting, the beds are mulched.
Reference. Mulching - covering the beds with mulch from cut grass, straw, hay, bark, leaves, sawdust, cut paper and cardboard, decomposed compost. Mulch retains moisture, protects plants from pests, weeds and enriches the soil with useful microelements.
Beds-boxes

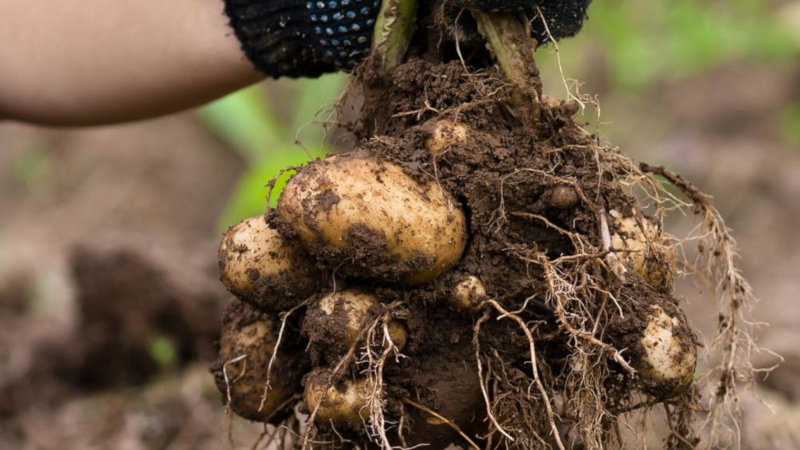
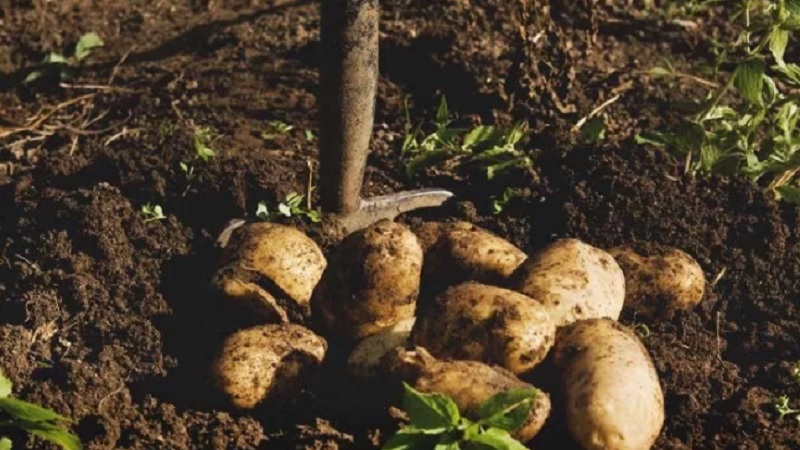
It is also called a high potato bed. Growing potatoes in bed-boxes reveals the potential of each variety: from 2 to 4 kg of root crops can be harvested from a bush. Boxes are made when there is no large area for planting. They can be seen along the terraces and verandas of the house. They do not violate the design of the courtyard, they look neat. Watering and hilling potatoes in these ridges is easy, and the passages between them remain clean.
Potatoes in bed-boxes are planted in holes located in two rows, the distance between the tubers is 20-30 cm.The hole is made deep into the bayonet of a shovel, superphosphate, humus, ash, ammonium nitrate (one fertilizer) are placed, on top - a tuber and fall asleep. The ridge is mulched.
Attention! If you make a layer of mulch with a height of 10-20 cm, the potatoes do not need to be hilled and weeded.
Making a bed-box
A bed-box is a frame that is made of boards. It is placed on the surface of the soil and filled with soil.
Manufacturing steps:
- bed frame - 1-1.5 m wide;
- the height of the boards is 20-40 cm;
- length - up to 4 m;
- aisles between the beds - 60 cm;
- treat the tree with an antiseptic against rot.
Vertical beds
The vertical method of growing potatoes saves time and effort. These beds take up little space. You can arrange them from a barrel or bag.
Planting potatoes in a barrel
Dig a hole at least 40 cm deep, put 7-8 cm compost on the bottom, a large tuber on top, cover with a 9-10 cm layer of compost. And put a barrel without a bottom on top. Punch holes over the entire surface for oxygen to enter the soil.
When the seedlings reach 2-3 cm, sprinkle them with compost. And so on to the top of the barrel. At the end of the growing season, there will be up to 1 bucket of tubers at the bottom. If you add new tubers to the barrel after it is half full, the yield can be doubled.
Planting potatoes in plastic bags
Fill the bag to the brim with a mixture of humus, soil and compost in equal proportions. For greater stability, the edges of the bags are turned outward. Make diamond-shaped cuts on the sides of the bag, plant sprouted tubers in them. Place the bags along the edges of the plot, between fruit trees or along ditches. You need to harvest by shaking out the soil from the bag.
Important! It is customary to plant varieties of Bellarosa, Shante, Nadezhnaya, Molodezhnaya in bag beds, Svitanok Kiev, Poven and Slavyanka.
Furrow beds
Planting potatoes in this way increases yields due to loose and airy soil, just the kind that is needed for potato growth.
Dig a furrow 20 cm wide and 15 cm deep, put the tubers in it in 30 cm steps, lightly sprinkle it with earth. When the tops appear, sprinkle the earth until a mound forms above the surface. You can alternate the earth with ash and humus.
Important! A stable harvest grows annually if the furrows are dug in the fall, and tubers are planted in them in the spring.
Preparation of planting material - greening and rejection
Tubers are prepared for planting in 1-1.5 months. Tubers are selected a little more than a chicken egg, even in shape, without rot, cracks and dents.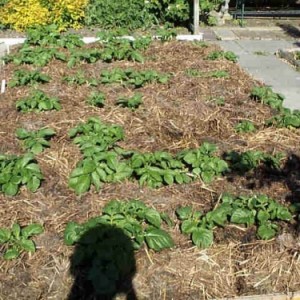
Wash the seed potatoes, put them in a container, pour hot water (about + 45 ° C) and leave until the water temperature approaches room temperature. Dissolve potassium permanganate in a separate container, pour into a container with potatoes and stir until the water turns pink. Leave so for 15 minutes. Then drain the water, rinse the tubers and dry. In this way, pathogens are removed from the surface of the tubers.
For greening, the tubers are laid out for 15-20 days.During this time, the plant poison solanine is formed in the subcutaneous layer of the tubers, so the seed potatoes are not touched by either mice or gnawing insects. In order for the light to reach the tubers in the same way, they are placed in glass jars and placed on the windowsill, the jars are turned every two days. The same effect will be obtained if the tubers are laid out in one layer on newspapers and placed on a closet or windowsill.
To germinate the tubers, they are removed to a warm and dark place. The best option is to arrange it in cardboard boxes in one layer, far from each other so that the emerging sprouts do not touch each other. Then lay a layer of newspapers and put up to three more layers of tubers, overlapping with newspapers. Place the closed box near the battery. The sprouts are considered good when they are 4-5 cm long, which should take about two to three weeks.
If sprouts do not appear on the tubers or they are thin, filamentous, such material is discarded - it will no longer give full-fledged shoots and harvest.
Landing methods and basic schemes
Together with the alternative methods of planting potatoes, which were mentioned above, three traditional ones are also used. Their choice depends on the type of soil and its moisture.
Smooth way
Potatoes are planted under a shovel. Suitable for dry areas. With this method of planting, moisture from the soil evaporates less.
The site is being dug up in the fall. With twine fixed on pegs, set the direction of the rows 70 cm apart. Dig holes with a distance of 25-30 cm, the depth is half a shovel bayonet, put seed material in them, fill the previous hole with earth from a new hole. After the entire planting, the ground is leveled with a rake.
Advice! In this way, it is more convenient to plant together. The first farmer digs holes, the second plants potatoes, adds fertilizer. Then the first one fills up the hole, digging a new one.
Ridge landing
The method is used with a close location of groundwater on heavy loamy soils. The ridge planting method provides air access and warming up the soil.
The combs are cut with a plow in the fall after fertilization. The distance between the ridges is 70 cm, the height is 12-15 cm, the depth of planting of tubers is 6-8 cm, the distance between the holes is 25-30 cm. Large tubers are planted at the maximum depth, smaller tubers - by 5 cm.
Trench way
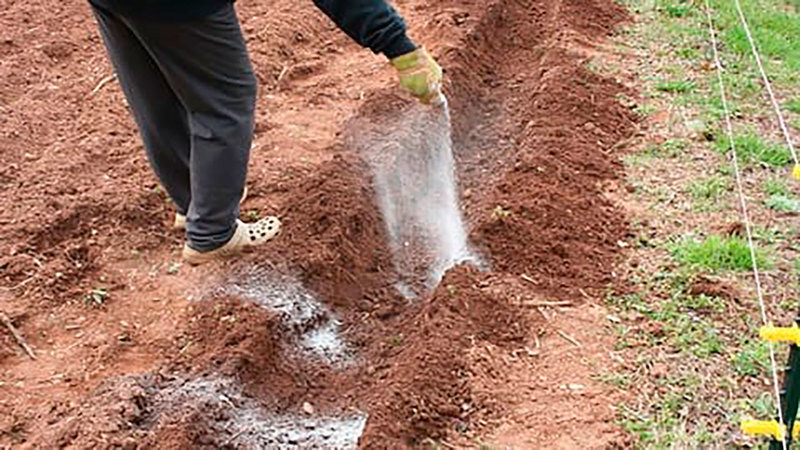
With this method of planting, it is not necessary to huddle the bushes and loosen the soil. The land is prepared in the fall: they dig trenches up to half a meter deep along the entire length of the garden bed, fill them with leaves, compost, peat, humus, straw.
In the spring, the trenches are covered with a black film, so the earth will warm up faster. The heated soil in the trenches is sprinkled with ash and soil 3–5 cm. Sprouted tubers are planted at a distance of 25–30 cm, covered with peat-mixture, mowed grass, compost at 8–10 cm and covered with foil.
After the emergence of shoots, the film is removed, the seedlings are covered with compost 10 cm in height and covered again, the procedure will be repeated again. When the third seedlings appear, holes are cut in the film for them.
Weed growth is mechanically stopped, and the tubers grow in warmth and moisture due to the decomposition of plant residues.
Tips & Tricks
Each gardener has his own secrets of productivity. Here are some general guidelines for all potato planting methods.
- Mid-season and late potatoes are planted when bird cherry blossoms in the region. Early potatoes - when the topsoil dries out.
- For any type of planting, the rows of potatoes should be oriented from north to south - this is how better lighting in the aisles, while the side shoots on which the tubers grow becomes larger.
- For planting, tubers are chosen the size of a chicken egg: they contain just as much nutrients as the plant needs to sprout 25-30 cm and develop the root system.
- Early varieties of potatoes can be dug out 60-70 days after sprouting: Lark, Early Spring, Bullfinch, Anosta, Luck, Prior, Ostara, Latona, Skala.They are completely removed from the site at the beginning of August so that they do not rot in the ground. Medium early varieties can be consumed in 70–80 days: Raduga, Nevsky, Detskoselsky, Sineglazka, Elizaveta, Skazka, Charodey, Naiad, Impala, Sante. Harvest them at the end of August. Mid-season varieties are tried after 80-90 days: Lugovskoy, Granola, Petersburg, Resurs, Shaman. Harvested at the beginning of September.
- You should not plant potatoes in one place from year to year, especially if tomatoes have grown there before. Potatoes, like nightshades, are prone to late blight and other similar diseases. The best ones are to plant tubers where onions, cucumbers, garlic, radishes, cabbage, radishes, beans, green peas grew. The land after potatoes is renewed in 3-4 years.
- To get 2-3 more tubers from the bush, they cut off the flowers on the bush. Potatoes will spend less energy on flowering, and will direct them to growing tubers.
- Fertilizers for potatoes need nitrogen and potash. Delicious potatoes grow on rotted manure and peat-manure compost. Like tubers and ash, it is sprinkled at the rate of 300 g per square meter.
- This recipe will help to save the tubers for seed until next year: pour 2-3 buckets of boiling water into the container, add 0.5 teaspoon of potassium permanganate, lower the tubers in the tubers in the net for 4 seconds, remove and dry. The sprouts will not break through prematurely, the tubers will not rot or turn green.
Read also:
What is the calorie content of potatoes and do they get fat from it?
Conclusion
Many of us have stereotypes about how to make potato beds. Summer residents most often choose traditional methods, without even thinking about their effectiveness. Do not be afraid to change your view of things: try new schemes, maybe even alternative ones.
Prepare tubers for planting, plant on time, fertilize, store properly until next year. A rich harvest!