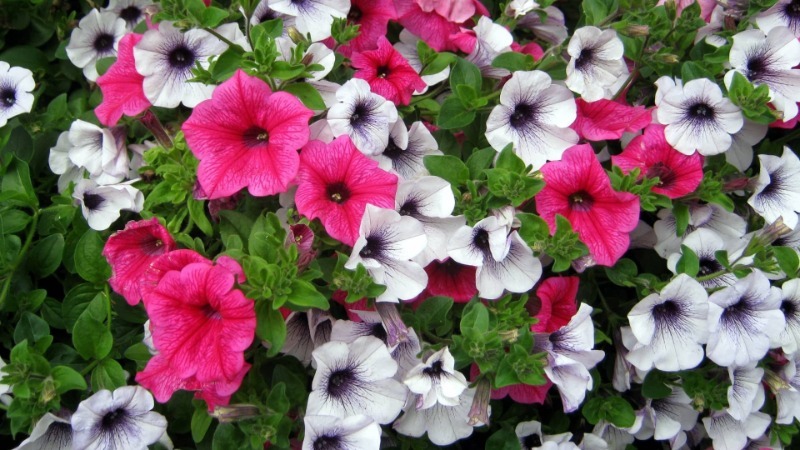
Summer petunia cuttings guide for beginner florists
Petunia is a beautiful, unpretentious plant that blooms from early spring to the very frost. Having bought planting material once, the culture is propagated an unlimited number of times by cuttings or seeds.
Most growers prefer cuttings, as it allows you to quickly get developed flowering seedlings, regardless of which mother plant is used - hybrid or varietal. The results of growing from seeds are unpredictable: the signs of a hybrid are rarely transmitted to the seeds, and the inflorescences are easily pollinated.
How to propagate petunia cuttings for the winter, read on.
The content of the article
Features of cuttings of petunias in summer
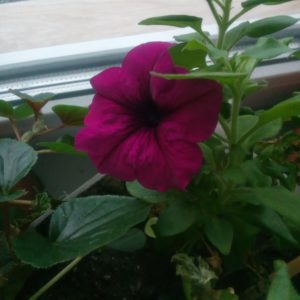
In summer, the plant is in a state of active growth, takes root easily, and when cuttings are strong and healthy. Next spring it will be a flowering spreading bush.
It is recommended to cut petunia when it continues to bloom, but summer is already over. Most growers cut the planting material in August.
The part that remains after grafting will die during night frosts. After the cuttings are separated from the bush, they immediately start rooting. If you delay, the material will wither.
When grafting petunias in the summer at home, seedlings take root most quickly and grow a strong root system. This period is considered the most favorable.
Advantages and disadvantages
Cutting has many advantages:
- Preservation of plant traits. It doesn't matter if a hybrid was used or a variety, an almost exact copy will turn out from the cuttings.
- Speed. Seedlings obtained from seeds are extremely rare. Petunia grown from the cuttings, it will bloom 2 months after planting.
- Strong root system that forms with a vegetative reproduction method.
- Undemanding care. Cuttings survive gardener mistakes more easily than seedlings.
- Saving. Such flower reproduction is cheaper than buying ready-made seedlings and seeds of the variety you like.
There are not many disadvantages. Firstly, the collected planting material will have to be stored all winter, creating optimal conditions for it. Secondly, if the cuttings are improperly processed, the seedlings can get sick.
Timing
Any time of the year is suitable for cuttings. Approximate terms of this procedure:
- Summer. It is considered the most suitable period. Cuttings are carried out in August.
- Winter. To obtain cuttings, you will have to keep the petunia at home for the whole winter. The best time for the procedure is February.
- Spring. A plant that has stood at home all winter is suitable for cuttings. The optimal time is the beginning of March.
- Autumn is the most inappropriate period, since all the life processes of the plant slow down. If necessary, they try to collect planting material in September.
Selection of mother plant
For successful rooting, it is important to choose the correct mother plant. Its main parameters:
- sprawling blooming bush with bright foliage;
- the plant is strong and healthy (specimens with spots, damage and other traces of the disease will not work);
- petunia bloomed actively all season and did not get sick.
Recovered plants are weak and have low immunity. Often their cuttings do not take root. Even if such planting material takes root, the risk that it will get sick is great.
Bushes that bloom profusely and develop rapidly will produce the same planting material. Cuttings of weak plants will have few flowers.
Selection and preparation of cuttings
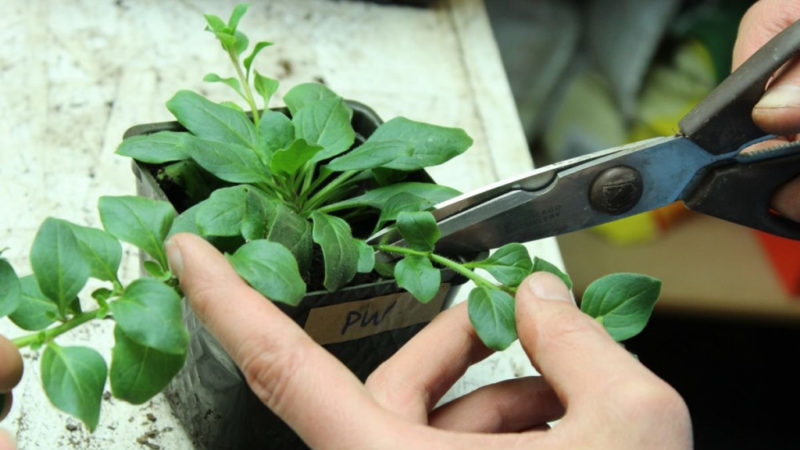
It is better to take planting material from the top of the plant. It will grow and develop faster. The branches should be bright and undamaged.
How to cut petunia:
- 6-12 cm recede from the end of the selected branch. If you take a branch of greater or lesser length, it will be problematic to root it. The resulting cutting should have 4 to 6 sheets. The most powerful branches on the plant are suitable for reproduction.
- The cut is made at an angle of 45 °. The cut site is not processed.
- After receiving the planting material, they immediately begin to root it. In a day, the stalk will wither and become unusable.
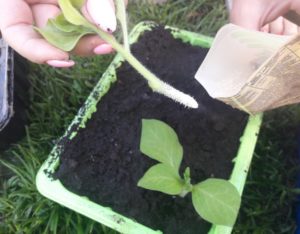
Preparation for landing includes the following procedures:
- Scrap of leaves. 2 top leaves are left on the handle, the rest are removed.
- Disinfection. The material is soaked for 15 minutes in a light pink solution of potassium permanganate.
- Stimulates root formation. To do this, the seedling is soaked for a day in a solution of "Heteroauxin" prepared according to the instructions (2 tablets per 1 liter of water).
If the cuttings are not disinfected, there is a risk of contamination of other indoor plants.
Rooting methods
There are several ways to root petunias. Some require the purchase of a special substrate for planting, for others, fairly familiar materials. All options have different planting technology and are actively used by flower growers.
In the ground
Rooting petunia in the ground Is the most popular and reliable method. All varieties of this plant root well and easily tolerate a pick. With this method, the flower will not experience stress during transplantation.
For rooting, you need a light but nutritious substrate. A versatile flower mix will do. Many gardeners prepare their own soil from peat, sand and garden soil (2: 2: 1). According to reviews, to improve the effect, it is better to replace sand with vermiculite.
Attention! In the soil mixture, soil is used taken from the place where the petunia will grow. Then the flower will easily transfer the pick to the open ground.
Drainage must be used: broken brick, small expanded clay, chipped ceramics.
The soil and drainage are disinfected. To do this, use one of the methods:
- poured with boiling water or a dark pink solution of potassium permanganate;
- calcined in the oven or in a pan;
- watered with a solution prepared from 1 tbsp. l. copper sulfate and 10 liters of water.
Peat pots, small disposable cups or cut bottles are used as containers. To create a greenhouse effect, you will need a transparent plastic bag or the upper part from a plastic bottle (it is more convenient to use it, since you just need to unscrew the lid for airing).
Step-by-step instructions for rooting petunia in the ground:
- A drainage layer is poured onto the bottom of the container. The rest of the space is filled with soil. The soil is moistened with warm water.
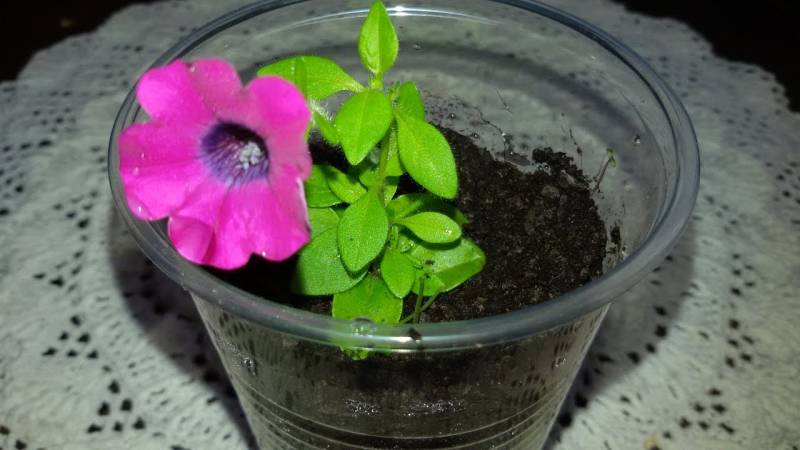
- Cuttings are planted in the ground, deepening by 1.5–2 cm. They should stand without support, but so that the leaves do not touch the ground.
- Cover the stalk and container with a film or a cut bottle. The resulting "greenhouse" is ventilated daily for 15 minutes.
- The seedlings are watered as the soil dries up with warm, settled water. The liquid should not get on the aerial part of the plant. After each watering, the soil is sprinkled with dry sand.
Rooting is evidenced by new leaves starting to form on the seedlings. From this moment on, the duration of the airing is increased. Soon the "greenhouse" is being dismantled.
Plants are transplanted together with an earthen clod in a larger container when the roots fill the entire space.
Attention! Some growers root cuttings in a common container. In this case, they are planted as soon as the roots are formed. The disadvantage of this method is that if one plant is damaged by a black leg, everyone will get sick.
In water
This method does not require soil preparation and a lot of time for planting. The seedlings dive into individual pots immediately after the roots appear.
Rooting in water is not suitable for all varieties of petunias. There is a risk of decay of the planting material if the technology is violated.
Therefore, it is important to follow the instructions:
- Cuttings are chosen not shorter than 8 cm. As in the first case, all leaves, except for the top two, are torn off.
- The glass is half filled with water. A tablet of crushed activated carbon is dissolved in a liquid. This will reduce the risk of decay of the planting material.
- Place 1-2 branches in each glass. They are covered with plastic wrap or a cut bottle and stored in a warm, dark place.
- The film is removed daily and the plant is ventilated for 15 minutes. As the water decreases, it is topped up.
When the roots appear on the seedlings, they are transplanted into individual pots, without deepening the root collar.
In vermiculite and hydrogel
In vermiculite, the cutting gets enough air, moisture and nutrients for rooting. The landing takes place like this:
- Vermiculite with a fraction of 1-2 mm is poured into the container. The height of the layer should be 3–5 cm. The substrate is saturated with water, allowing the excess to drain through the drainage holes.
- The stalk is immersed in vermiculite and covered with foil. It is ventilated daily for 15 minutes. Liquid drops are carefully removed from the film.
- When the seedling is overgrown with roots, it is transplanted into an individual container.
By the same principle, seedlings are grown in a hydrogel. First, the substrate is saturated with water so that it turns into wet balls. This method is not only simple, but also aesthetic.
In peat tablets
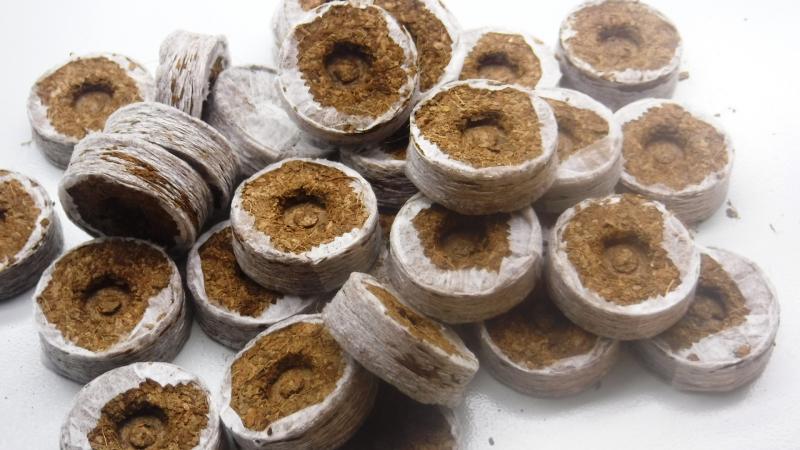
Florists often use peat tablets to breed petunias. They are filled with soil ideal for cultivation. One plant is planted in one tablet. The resulting pouch does not have to be removed from the roots, even during transplantation.
How petunia multiplies in peat tablets:
- The tablets are put in a deep container and poured with a small amount of boiling water. As the liquid is absorbed, hot water is added. When the tablets take the form of bags, they are placed in another container (without water) and allowed to cool.
- One cuttings are planted in each tablet. The planting material is buried 2-3 cm.
- The plants are covered with foil. Air daily for 15 minutes.
- As the peat dries, it is watered. Water should not get on the leaves of the seedlings.
When new leaves begin to form, the film is removed. Petunia is transplanted directly in peat bags into a large container when the root system fills the entire space.
How to cut petunia for the winter
For reproduction in winter, at the end of August or early September, the bush is dug up together with a lump of earth and transplanted into a pot, while the plant continues to bloom.
Important! Before you bring the transplanted petunia into the house, it is treated with fungicides and insecticides. This will kill infections and pests.
The flower is stored on a balcony or in another room with a temperature of at least + 2 ° C. His supplemented and watered periodically.
In mid-February, shoots are cut, which are rooted. The procedure is no different from growing seedlings in the summer, except that the seedlings will need additional lighting.
Features of cuttings of vegetative petunia
Ampel and terry petunias do not propagate by seeds. The latter do not even give them, so such plants are bred exclusively in a vegetative way.
For terry petunia, the method of rooting cuttings in water is not suitable. It is best to plant it directly into the ground or peat bags.
Further care
With summer cuttings, the seedlings are left at home for autumn and winter. In this case, it is important to follow the rules of care.
In the cold season, the plant does not have to pay much attention:
- The pots are placed on the eastern windowsill. The seedlings do well at room temperature. They will not die on the balcony if the temperature does not drop below + 2 ° C.
- Water the petunia as the soil dries. Use settled tap water or melt water at room temperature. The liquid is poured only under the root, since it should not fall on the leaves.
- In winter, the flower will need additional lighting. Its daylight hours are 12-14 hours. Fitolamps are installed at a distance of 20 cm from the plant.
- Top dressing is applied only if the petunia blooms. The soil is fertilized every 2 weeks with compounds including phosphorus and potassium.
Tips from experienced florists
Expert advice from experienced florists will help you avoid many problems when growing seedlings from cuttings:
- When rooting the cuttings in water, coal is replaced with a light pink solution of potassium permanganate.
- To reduce the risks of diseases, drainage must be added to the pot.
- It is advisable to use purified or melt water for irrigation. Tap liquid with chlorine and various chemical impurities will cause root rot and leaf fall.
- So that the plant does not hurt, the formation of a soil crust must not be allowed. A day after watering, the ground around the flower is loosened. It is convenient to do this with an ordinary fork.
Conclusion
Propagation of petunia by cuttings is the easiest way to grow it. Unlike the generative method, the grower does not have to pay much attention to the care of the seedlings. In this case, an exact copy of the mother plant will be obtained from the planting material.